Wednesday, August 29, 2012

MySQL Scalability Architecture

MySQL Scalability Practice


Agenda

Ø  Brief Introduction
Ø  High Availability and Scalability
Ø  MySQL Replication
Ø  MySQL Cluster
Ø  DRBD
Ø  Resources
MySQL Brief introduction
Ø  High performance
Ø  Reliable 
Ø  Easy To Use


High Availability

       7 * 24 * 365  online
       Single point of failure
       Auto Recover
Scalability
            Scalability refers to the ability to spread the load of your application queries across multiple MySQL servers.
Scalability - Scale up
       Scale vertically - add resources to a single node in a system, typically involving the addition of CPUs or memory to a single computer.
       Pros :
ü    Simple Maintenance
ü    Centralization Data, Simple application architecture
       Cons :
ü    Expensive Device
ü    Limitation of processing, Prone to bottleneck
ü    Single point of failure     
Scalability - Scale out
       Scale horizontal - add more nodes to a system, such as adding a new computer to a distributed software application.
       Pros :
ü    Bottleneck is not easy occur
ü    Low cost device.
ü    Little impact on single point of failure, HA
       Cons :
ü    More nodes, more complex
ü    Difficult to maintain

Scalability - Scale out
       Database Scale out How?
Scalability – Principle
       Principle 
Ø  Minimize  Transaction Relevance
Ø  Data Consistency, BASE model
Ø  HAData Security. Data Redundancy.
MySQL Replication
Features :
o   Across different platforms
o   Asynchronous
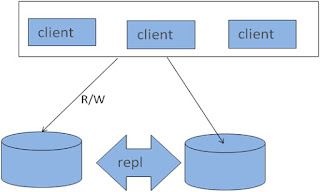
o   One master to any number of slaves.(separate R/W)
o   Data can only be written to the master
o   No guarantee that data on master and slaves will be consistent at a given point in time.
MySQL Replication – Process
Master
                       I/O thread
                       Binary Log (mysqld log-bin)
Slave  
                       I/O thread
                       SQL thread
                       Relay Log
                       Master-info

MySQL Replication – Level
Ø  Statement Level
Ø  Row Level (support from 5.1.5)
Ø  Mixed Level (support from 5.1.8,default)


MySQL Server Architecture


MySQL Replication – Architecture
      Master-slaves
MySQL Replication – Architecture


      Master – Master

MySQL Replication – Architecture
      Master-Slaves-Slaves
  
MySQL Replication - Architecture

MySQL Replication – Architecture
 MySQL Replication – Architecture
Sharding
Ø  Vertical Sharding
            according to function, different table locate on different DB
Ø  Horizontal Sharding
            data on same table locate on different DB
Ø  Mixed Sharding
      Pros and Cons
Application System How to integrate all of data source?
Ø  Each application system maintain its required data sources
Ø  Unified management by middle layer
o   Self-developed
o   MySQL Proxyconnection route, load balance, HA query filter query modify
o   Amoebabased on java
o   HiveDB 


Sharding Problems
Ø  Distribute transaction question
Ø  Join cross multi nodessupported by federated storage engine
Ø  Merge sort paging cross multi nodes


MySQL Cluster 
Ø  Real-time transactional relational
Ø     “Shared-nothing" distributed architecture
Ø      No single point of failure, two replicas is needed
Ø      Synchronous and two-phase commit
Ø      R/W on any nodes
Ø      Automatic failover between nodes
  
Shared-Nothing
MySQL Cluster
MySQL Cluster
       Three parts:

Ø  Manage node
Ø  SQL node, startup with ndbcluster
Ø  NDB data node
           Data storage and management of both in-memory and disk-based data
            Automatic and user defined partitioning of data
            Synchronous replication of data between data nodes
            Transactions and data retrieval
            Automatic fail over
            Resynchronization after failure
MySQL Cluster
MySQL Cluster

Ø  Cluster Nodes
Ø   Node Groups
[number_of_node_groups] = number_of_data_nodes / NumberOfReplicas
Ø  Replicas
The number of replicas is equal to the number of nodes per node group
Ø  Partitions
This is a portion of the data stored by the cluster
MySQL Cluster normally partitions NDBCLUSTER tables automatically Horizontal Data Partitioning. Based on hash algorithm based on the primary key on the table.

MySQL Cluster
MySQL cluster replication
Replicate asynchronously
DRBD (Distributed Replicated Block Device) 
DRDB is a solution from Linbit supported only on Linux. DRBD creates a virtual block device (which is associated with an underlying physical block device) that can be replicated from the primary server to a secondary server. 
MySQL HA
Resources
Ø  HA: Heartbeat
Ø  Load balance : F5/NetScalar/LVS/HAProxy
Ø  Monitor : Nagios/cacti

Tuesday, August 28, 2012

Script to copy files from one host to a group of hosts

#/usr/bin/sh
# This is a script to copy files from one host to a group of hosts

# There are three variables accepted via commandline
# $1 = first parameter (/source_path/source_filename)
# $2 = second parameter (/target_directory/)
# $3 = third paramter (file that contains list of hosts)

SOURCEFILE=$1
TARGETDIR=$2
HOSTFILE=$3

if [ -f $SOURCEFILE ]
then
   printf "File found, preparing to transfer\n"
   while read server
   do
      scp -p $SOURCEFILE ${server}:$TARGETDIR
   done < $HOSTFILE
else
   printf "File \"$SOURCEFILE\" not found\n"
   exit 0
fi
exit 0

Sample starter my.cnf for different systems

32 bit system
2GB of memory
Dedicated DB Box
All innodb tables
32 bit system
4GB of memory
Dedicated DB Box
All Innodb tables
[mysqld]
user = mysql
pid-file = /var/run/mysqld/mysqld.pid
socket = /var/run/mysqld/mysqld.sock
port = 3306
basedir = /mysql/
datadir = /data01/data
tmpdir = /tmp
thread_cache_size = 64
table_cache = 64
key_buffer = 64M
sort_buffer_size = 256K
read_buffer_size = 256K
read_rnd_buffer_size = 256K
max_allowed_packet = 1M
tmp_table_size=16M
max_heap_table_size=16M
query_cache_size=64M
query_cache_type=1
log_output=FILE
slow_query_log_file=/mysql/slow1.log
slow_query_log=1
long_query_time=3
log-error=/mysql/error.log
innodb_data_home_dir = /data01/data
innodb_data_file_path = ibdata1:1000M:autoextend
innodb_buffer_pool_size = 768M
innodb_additional_mem_pool_size = 8M
innodb_flush_log_at_trx_commit = 1
innodb_support_xa = 0
innodb_lock_wait_timeout = 50
innodb_flush_method=O_DIRECT
innodb_log_files_in_group = 2
innodb_log_file_size = 64M
innodb_log_buffer_size = 8M
innodb_thread_concurrency = 8
[mysqld]
user = mysql
pid-file = /var/run/mysqld/mysqld.pid
socket = /var/run/mysqld/mysqld.sock
port = 3306
basedir = /mysql/
datadir = /data01/data
tmpdir = /tmp
thread_cache_size = 64
table_cache = 64
key_buffer = 64M
sort_buffer_size = 256K
read_buffer_size = 256K
read_rnd_buffer_size = 256K
max_allowed_packet = 1M
tmp_table_size=16M
max_heap_table_size=16M
query_cache_size=64M
query_cache_type=1
log_output=FILE
slow_query_log_file=/mysql/slow1.log
slow_query_log=1
long_query_time=3
log-error=/mysql/error.log
innodb_data_home_dir = /data01/data
innodb_data_file_path = ibdata1:1000M:autoextend
innodb_buffer_pool_size =2048M
innodb_additional_mem_pool_size = 8M
innodb_flush_log_at_trx_commit = 1
innodb_support_xa = 0
innodb_lock_wait_timeout = 50
innodb_flush_method=O_DIRECT
innodb_log_files_in_group = 2
innodb_log_file_size = 128M
innodb_log_buffer_size = 8M
innodb_thread_concurrency = 8
32 bit system
8GB+ of memory
Dedicated DB Box
All Innodb tables
64 bit system
8GB of memory
Dedicated DB Box
All innodb tables
******  Go download a 64Bit OS.  ****** [mysqld]
user = mysql
pid-file = /var/run/mysqld/mysqld.pid
socket = /var/run/mysqld/mysqld.sock
port = 3306
basedir = /mysql/
datadir = /data01/data
tmpdir = /tmp
thread_cache_size = 128
table_cache = 256
key_buffer = 64M
sort_buffer_size = 256K
read_buffer_size = 256K
read_rnd_buffer_size = 256K
max_allowed_packet = 1M
tmp_table_size=32M
max_heap_table_size=32M
query_cache_size=128M
query_cache_type=1
log_output=FILE
slow_query_log_file=/mysql/slow1.log
slow_query_log=1
long_query_time=2
log-error=/mysql/error.log
innodb_data_home_dir = /data01/data
innodb_data_file_path = ibdata1:1000M:autoextend
innodb_buffer_pool_size = 5120M
innodb_additional_mem_pool_size = 8M
innodb_flush_log_at_trx_commit = 1
innodb_support_xa = 0
innodb_lock_wait_timeout = 50
innodb_flush_method=O_DIRECT
innodb_log_files_in_group = 2
innodb_log_file_size = 64M
innodb_log_buffer_size = 8M
innodb_thread_concurrency = 8
64 bit system
16GB of memory
Dedicated DB Box
All Innodb tables
64 bit system
32GB of memory
Dedicated DB Box
All Innodb tables
[mysqld]
user = mysql
pid-file = /var/run/mysqld/mysqld.pid
socket = /var/run/mysqld/mysqld.sock
port = 3306
basedir = /mysql/
datadir = /data01/data
tmpdir = /tmp
thread_cache_size = 128
table_cache = 512
key_buffer = 64M
sort_buffer_size = 256K
read_buffer_size = 256K
read_rnd_buffer_size = 256K
max_allowed_packet = 1M
tmp_table_size=32M
max_heap_table_size=32M
query_cache_size=128M
query_cache_type=1
log_output=FILE
slow_query_log_file=/mysql/slow1.log
slow_query_log=1
long_query_time=2
log-error=/mysql/error.log
innodb_data_home_dir = /data01/data
innodb_data_file_path = ibdata1:1000M:autoextend
innodb_buffer_pool_size = 12288M
innodb_additional_mem_pool_size = 8M
innodb_flush_log_at_trx_commit = 1
innodb_support_xa = 0
innodb_lock_wait_timeout = 50
innodb_flush_method=O_DIRECT
innodb_log_files_in_group = 2
innodb_log_file_size = 128M
innodb_log_buffer_size = 8M
innodb_thread_concurrency = 12
[mysqld]
user = mysql
pid-file = /var/run/mysqld/mysqld.pid
socket = /var/run/mysqld/mysqld.sock
port = 3306
basedir = /mysql/
datadir = /data01/data
tmpdir = /tmp
thread_cache_size = 256
table_cache = 1024
key_buffer = 64M
sort_buffer_size = 256K
read_buffer_size = 256K
read_rnd_buffer_size = 256K
max_allowed_packet = 1M
tmp_table_size=32M
max_heap_table_size=32M
query_cache_size=128M
query_cache_type=1
log_output=FILE
slow_query_log_file=/mysql/slow1.log
slow_query_log=1
long_query_time=2
log-error=/mysql/error.log
innodb_data_home_dir = /data01/data
innodb_data_file_path = ibdata1:1000M:autoextend
innodb_buffer_pool_size =24676M
innodb_additional_mem_pool_size = 8M
innodb_flush_log_at_trx_commit = 1
innodb_support_xa = 0
innodb_lock_wait_timeout = 50
innodb_flush_method=O_DIRECT
innodb_log_files_in_group = 2
innodb_log_file_size = 128M
innodb_log_buffer_size = 8M
innodb_thread_concurrency = 16
NOTE: If you change you log file size, you will get errors unless you move the old ones and allow innodb to recreate them ( do it with the DB down by the way )… once again I offer no warranty.

You may also want to turn of swappiness to avoid swapping

Also of consideration to add is:

innodb_file_per_table
innodb_flush_method=O_DIRECT
 

Insight into doing large backup with mysqldump

INSIGHT INTO DOING BACKUPS WITH mysqldump

IMHO Doing backups has become more of an art form if you know just how to approach it
You have options

Option 1 : mysqldump an entire mysql instance
This is the easiest one, the no-brainer !!!
mysqldump -h... -u... -p... --routines --triggers --all-databases | gzip > MySQLData.sql.gz
Everything written in one file: table structures, indexes, triggers, stored procedures, users, encrypted passwords. Other mysqldump options can also export different styles of INSERT commands, log file and position coordinates from binary logs, database creation options, partial data (--where option), and so forth.

Option 2 : mysqldump separate databases into separate data files
Start by creating a list of databases (2 techniques to do this)
Technique 1
mysql -h... -u... -p... -A --skip-column-names -e"SELECT schema_name FROM information_schema.schemata WHERE schema_name NOT IN ('information_schema','mysql')" > ListOfDatabases.txt
Technique 2
mysql -h... -u... -p... -A --skip-column-names -e"SELECT DISTINCT table_schema FROM information_schema.tables WHERE table_schema NOT IN ('information_schema','mysql')" > ListOfDatabases.txt
Technique 1 is the fastest way. Technique 2 is the surest and safest. Technique 2 is better because, sometimes, users create folders for general purposes in /var/lib/mysql (datadir) which are not database related. The information_schema would register the folder as a database in the information_schema.schemata table. Technique 2 would bypass folders that do not contain mysql data.
Once you compile the list of databases, you can proceed to loop through the list and mysqldump them, even in parallel if so desired.
for DB in `cat ListOfDatabases.txt`
do
    mysqldump -h... -u... -p... --routines --triggers ${DB} | gzip > ${DB}.sql.gz &
done
wait
If there are too many databases to launch at one time, parallel dump them 10 at a time:
COMMIT_COUNT=0
COMMIT_LIMIT=10
for DB in `cat ListOfDatabases.txt`
do
    mysqldump -h... -u... -p... --routines --triggers ${DB} | gzip > ${DB}.sql.gz &
    (( COMMIT_COUNT++ ))
    if [ ${COMMIT_COUNT} -eq ${COMMIT_LIMIT} ]
    then
        COMMIT_COUNT=0
        wait
    fi
done
if [ ${COMMIT_COUNT} -gt 0 ]
then
    wait
fi
Option 3 : mysqldump separate tables into separate data files
Start by creating a list of tables
mysql -h... -u... -p... -A --skip-column-names -e"SELECT CONCAT(table_schema,'.',table_name) FROM information_schema.tables WHERE table_schema NOT IN ('information_schema','mysql')" > ListOfTables.txt
Then dump all tables in groups of 10
COMMIT_COUNT=0
COMMIT_LIMIT=10
for DBTB in `cat ListOfTables.txt`
do
    DB=`echo ${DBTB} | sed 's/\./ /g' | awk '{print $1}'`
    TB=`echo ${DBTB} | sed 's/\./ /g' | awk '{print $2}'`
    mysqldump -h... -u... -p... --triggers ${DB} ${TB} | gzip > ${DB}_${TB}.sql.gz &
    (( COMMIT_COUNT++ ))
    if [ ${COMMIT_COUNT} -eq ${COMMIT_LIMIT} ]
    then
        COMMIT_COUNT=0
        wait
    fi
done
if [ ${COMMIT_COUNT} -gt 0 ]
then
    wait
fi
Option 4 : USE YOUR IMAGINATION
Try variations of the aforementioned Options plus techniques for clean snapshots
Examples
  1. Order the list of tables by the size of each tables ascending or descending.
  2. Using separate process, run "FLUSH TABLES WITH READ LOCK; SELECT SLEEP(86400)" before launching mysqldumps. Kill this process after mysqldumps are complete.
  3. Save the mysqldumps in dated folders and rotate out old backup folders.
  4. Load whole instance mysqldumps into standalone servers.
CAVEAT
Only Option 1 brings everything. The drawback is that mysqldumps created this way can only be reloaded into the same majot release version of mysql that the mysqldump was generated. In other words, a mysqldump from a MySQL 5.0 database cannot be loaded in 5.1 or 5.5. The reason ? The mysql schema is total different among major releases.
Options 2 and 3 do not include saving usernames and passwords.
Here is the generic way to dump the SQL Grants for users that is readble and more portable
mysql -h... -u... -p... --skip-column-names -A -e"SELECT CONCAT('SHOW GRANTS FOR ''',user,'''@''',host,''';') FROM mysql.user WHERE user<>''" | mysql -h... -u... -p... --skip-column-names -A | sed 's/$/;/g' > MySQLGrants.sql
Option 3 does not save the stored procedures, so you can do the following
mysqldump -h... -u... -p... --no-data --no-create-info --routines > MySQLStoredProcedures.sql &
Another point that should be noted is concerning InnoDB. If your have a large InnoDB buffer pool, it makes sense to flush it as best you can before performing any backups. Otherwise, MySQL spends the time flushing tables with leftover dirty page out of the buffer pool. Here is what I suggest:
ABout 1 hour before performing the backup run this SQL command
SET GLOBAL innodb_max_dirty_pages_pct = 0;
In MySQL 5.5 default innodb_max_dirty_pages_pct is 75. In MySQL 5.1 and back, default innodb_max_dirty_pages_pct is 90. By setting innodb_max_dirty_pages_pct to 0, this will hasten the flushing of dirty pages to disk. This will prevent or at least lessen the impact of cleaning up any incomplete two-phase commits of InnoDB data prior to performing any mysqldump against any InnoDB tables.
FINAL WORD ON mysqldump
Most people shy away from mysqldump in favor of other tools and those tools are indeed good.
Such tools include
  1. MAATKIT (parallel dump/restore scripts, from Percona [Deprecated but great])
  2. XtraBackup (TopNotch Snapshot Backup from Percona)
  3. CDP R1Soft (MySQL Module Option that takes point-in-time snapshots)
  4. MySQL Enterprise Backup (formerly InnoDB Hot Backups [commercial])
If you have the spirit of a true MySQL DBA, you can embrace mysqldump and have the complete mastery over it that can be attained. May all your backups be a reflection of your skills as a MySQL DBA.

Import Big InnoDB Tables

Import Big InnoDB Tables

  1. turn off the logs;
  2. turn off unique key check if the table has;
  3. turn off foreign key check;
  • When importing data into InnoDB, make sure that MySQL does not have autocommit mode enabled because that requires a log flush to disk for every insert. To disable autocommit during your import operation, surround it with SET autocommit and COMMIT statements:  
  • SET autocommit=0; 
  • ... SQL import statements ... 
  • COMMIT; 
  • If you use the mysqldump option --opt, you get dump files that are fast to import into an InnoDB table, even without wrapping them with the SET autocommit and COMMIT statements. 
  • If you have UNIQUE constraints on secondary keys, starting from MySQL 3.23.52 and 4.0.3, you can speed up table imports by temporarily turning off the uniqueness checks during the import session: 
  • SET unique_checks=0; 
  • ... SQL import statements ... 
  • SET unique_checks=1; 
  • For big tables, this saves a lot of disk I/O because InnoDB can use its insert buffer to write secondary index records in a batch. Be certain that the data contains no duplicate keys.
  • # If you have FOREIGN KEY constraints in your tables, starting from MySQL 3.23.52 and 4.0.3, you can speed up table imports by turning the foreign key checks off for a while in the import session:  
  • SET foreign_key_checks=0; 
  • ... SQL import statements ... 
  • SET foreign_key_checks=1; 
  • For big tables, this can save a lot of disk I/O. 
  •  
  • If the above solution still can not quick your import process. Try mysqlimport. You can use mysqldump to dump a sql file and a text file. There is an example, look like this:

How to shrink an ibdata1 file with minimal MySQL downtime

The default mySQL configuration for InnoDB database tables creates a massive storage file called ‘ibdata1′. Basically, the ibdata1 file contains the table data of your InnoDB tables. In large production environments, this file can grow to be extremely large. On some of the servers I administer, I’ve seen this file exceed sizes of 30GB. Fixing the file size obviously has the effect of limiting the total amount of data which can be stored in InnoDB tables, so that’s not a viable option.

The ibdata1 file is by default ‘auto-growing’, so it will inflate as more data is put into InnoDB tables. After records are deleted from InnoDB tables, the file will contain pages marked as “free” which could be used for future data, but the file itself is unshrinkable.

The inability to shrink this file is a particularly annoying feature of MySQL. The ibdata1 file can’t actually be shrunk unless you delete all databases, remove the files and reload a dump. I’ve come up with a solution to do this with minimal downtime for the mySQL service (the length of time it takes for a normal service restart).

To do this, it’s necessary that you have enough disk space available to double your mySQL storage footprint. We’re in essence going to be spawning up a new service in a temporary ‘staging’ area, and then importing the data back in using the file-per-table option.
CAUTION: Be sure you have backups of your data before performing these operations. It is possible that something could go horribly wrong and ruin your day/week/month/year.


IMPORTANT: Before shrinking the ibdata file, be sure my.cnf is configured to use separate files per innoDB table:
sed ‘/innodb_file_per_table/d’ -i /etc/my.cnf
echo ‘innodb_file_per_table’ >> /etc/my.cnf
1. Get list of all InnoDB databases
mysql> SELECT `TABLE_SCHEMA`,`TABLE_NAME` FROM information_schema.tables WHERE ENGINE = ‘InnoDB’
2. Dump all of the databases to /root/all-databases.sql
/usr/bin/mysqldump –extended-insert –all-databases –add-drop-database –disable-keys –flush-privileges –quick –routines –triggers > /root/all-databases.sql
3. Prepare a secondary venue for which we can perform our magic
mkdir /var/lib/mysql2 # create a new staging area
rsync -avz /var/lib/mysql/mysql /var/lib/mysql2 # copy the mysql database w/grants
chown -R mysql.mysql /var/lib/mysql2 # set permissions correctly
4. Spin up the new mysqld instance, allowing it to create a fresh ibdata1 environment
Notes: to avoid conflicts we’re using temporary pid/socket/error files here, and skipping networking binding of 3306
/usr/sbin/mysqld –basedir=/usr –datadir=/var/lib/mysql2 –plugin-dir=/usr/lib64/mysql/plugin –user=mysql –log-error=/var/lib/mysql2/error.log –pid-file=/var/lib/mysql2/temp.pid –skip-networking –socket=/var/lib/mysql2/dirty.sock
5. Check out our new environment, ensure there’s no databases other than information_schema and mysql
# ls -lah /var/lib/mysql2
total 29M
drwxr-xr-x 3 mysql mysql 4.0K Aug 2 08:46 ./
drwxr-xr-x 28 root root 4.0K Aug 2 08:39 ../
srwxrwxrwx 1 mysql mysql 0 Aug 2 08:46 dirty.sock=
-rw-rw—- 1 mysql mysql 7.2K Aug 2 08:46 error.log
-rw-rw—- 1 mysql mysql 18M Aug 2 08:41 ibdata1
-rw-rw—- 1 mysql mysql 5.0M Aug 2 08:46 ib_logfile0
-rw-rw—- 1 mysql mysql 5.0M Aug 2 08:41 ib_logfile1

drwx–x–x 2 mysql mysql 4.0K Jun 27 07:27 mysql/
-rw-rw—- 1 mysql mysql 5 Aug 2 08:46 temp.pid # mysql -S /var/lib/mysql2/dirty.sock
mysql> show databases;
+——————–+
| Database |
+——————–+
| information_schema |
| mysql |
+——————–+
2 rows in set (0.00 sec)
6. In order for a successful import, we need to be able to drop the log tables. To do this we need to temporarily disable them:
mysql> SET @old_log_state = @@global.general_log;
mysql> SET GLOBAL general_log = ‘OFF’;
mysql> ALTER TABLE mysql.general_log ENGINE = MyISAM;
mysql> SET @old_log_state = @@global.slow_query_log;
mysql> SET GLOBAL slow_query_log = ‘OFF’;
mysql> SET GLOBAL log_slow_queries = ‘OFF’;
mysql> ALTER TABLE mysql.slow_query_log ENGINE = MyISAM;
7. While still in the console for the secondary server, disable foreign key settings and import, then enable foreign key checks again
# mysql -S /var/lib/mysql2/dirty.sock
mysql> SET FOREIGN_KEY_CHECKS=0;
mysql> SOURCE /root/all-databases.sql;
mysql> SET FOREIGN_KEY_CHECKS=1;
8. Finally, shut down both servers and move the new mysql directory into place. Upon restart, your conversion and shrinkage should be successful.
# service mysql stop
# killall mysqld
# mv /var/lib/mysql /var/lib/mysql.old
# mv /var/lib/mysql2 /var/lib/mysql
# service mysql start

Note: logging will automatically be turned back on provided you have the appropriate settings defined in your my.cnf

Monday, August 27, 2012

Common utilities for MySQL: openark tool kit

oak-online-alter-table: Perform a non-blocking ALTER TABLE operation

oak-online-alter-table

NAME

oak-online-alter-table: Perform a non-blocking ALTER TABLE operation

SYNOPSIS

Add an index on the Population column, City table, world database:
oak-online-alter-table --database=world --table=City --alter="ADD KEY(Population)"
Same as above, specify database with table name:
oak-online-alter-table --table=world.City --alter="ADD KEY(Population)"
Perform multiple alters:
oak-online-alter-table --table=world.City --alter="ADD KEY(Population), MODIFY Name VARCHAR(64) CHARSET utf8 NOT NULL"
Add column, drop column, modify AUTO_INCREMENT:
oak-online-alter-table --table=world.City --alter="ADD COLUMN Mayor VARCHAR(64) CHARSET utf8 DEFAULT '', DROP COLUMN district, MODIFY id SMALLINT AUTO_INCREMENT"
Do not ALTER, just rebuild City:
oak-online-alter-table --database=world --table=City
Create a ghost table called City_mirror, which is updated online from City table:
oak-online-alter-table --database=world --table=City --alter="ADD KEY(Population)" --ghost=City_mirror
Perform ALTER in chunks of 5000 rows:
oak-online-alter-table --table=world.City --alter="ADD KEY(Population)" --chunk-size=5000
Perform ALTER in chunks of 5000 rows, sleep for 20 milliseconds between chunks:
oak-online-alter-table --table=world.City --alter="ADD KEY(Population)" --chunk-size=5000 --sleep=20
Perform a cleanup for an aborted run:
oak-online-alter-table --database=world --table=City --cleanup
Provide connection parameters. Prompt for password:
oak-online-alter-table --database=world --table=City --alter="ADD KEY(Population)" --user=root --ask-pass --socket=/tmp/mysql.sock
Use a defaults file for connection parameters:
oak-online-alter-table --database=world --table=City --alter="ADD KEY(Population)" --defaults-file=/home/myuser/.my-oak.cnf

DESCRIPTION

oak-online-alter-table allows for non blocking ALTER TABLE operations, table rebuilds and creating a table's ghost. To run this utility, the following requirements must be met:
  • The table has at least one single-column UNIQUE KEY
  • Altered table shares a single-column UNIQUE KEY with the original table
  • No ‘AFTER’ triggers are defined on the table (the utility creates its own triggers for the duration of the operation)
  • The table has no FOREIGN KEYs
  • Table name is no longer than 57 characters
The utility provides with three basic functionalities:
  • A non blocking ALTER TABLE operation: adding columns or keys, dropping columns or keys, modifying columns, converting table character set etc., are all supported, under the following restrictions:
    • ADD COLUMN (new column must have a default value)
    • DROP COLUMN (as long as there’s still a shared single-column UNIQUE KEY between the old table and the altered one)
    • MODIFY COLUMN (change type, including UNIQUE KEY columns)
    • ADD KEY (normal, unique, fulltext etc.)
    • DROP KEY (as long as there’s still a shared single-column UNIQUE KEY between the old table and the altered one)
    • Change ENGINE: works, but great care should be taken when dealing with non-transactional engines
    • Adding FOREIGN KEY constraints is possible
    • More… Not all ALTERS have been tested, e.g. CONVERT, partition handling…
  • An empty ALTER, which rebuilds a table: potentially releasing disk space and organizing rows in a more optimized way on disk.
  • (May not be supported in future versions): Creating a live 'ghost' table, which is synchronized with the original table, as long as the following do not occur:
    • An ALTER TABLE on the original table
    • A TRUNCATE on the original table
    • LOAD DATA INFILE into the original table
    • OPTIMIZE on the original table
While the utility runs, it is allowed to invoke INSERT, UPDATE, DELETE, REPLACE on the original table. It is not allowed to TRUNCATE, ALTER, REPAIR, OPTIMIZE or otherwise perform a table-wide operation on the original table. The utility works with InnoDB tables, MyISAM tables, or otherwise any table-level locking storage engine (MEMORY, ARCHIVE). There is currently no support for PBXT or Falcon. The utility works by creating a ghost table for the duration of the runtime, which is slowly synchronized with the original table. When the synchronization is complete, it takes place of the original table. To do this, the utility must create AFTER INSERT, AFTER UPDATE, AFTER DELETE triggers on the original table. Synchronizing the ghost table with the original tables takes place in several steps. In one of those steps, data is copied from the original table to the ghost table. This is done in chunks of rows, the number of which is configurable using the chunk-size option. While a chunk is being copied, there is a read lock on the table (MyISAM, ARCHIVE, MEMORY) or on the rows contained in the chunk (InnoDB). The smaller the chunk - the faster the locks are removed, and the more concurrency is allowed; but also the longer it will take for the entire operation to complete. For write intensive application, it may be advisable to allow for pauses between chunks, so as to make as little impact as possible. This can be configured with the sleep option. While sleeping between chunks, no locks are placed. Even so, a performance impact is noticed while the application runs, and this is due to the triggers added on the table, and the propagation of DML statements to the ghost table. It is required to have enough disk space to accomodate the altered table (as in a normal ALTER TABLE). Only when the operation completes can there be a disk space regaining (depending on your storage engine and configuration).

OPTIONS

-a ALTER_STATEMENT, --alter=ALTER_STATEMENT
Comma delimited ALTER statement details, excluding the 'ALTER TABLE t' itself. When this options is not used, an 'empty' ALTER is performed, essentially rebuilding the table.
--ask-pass
Prompt for password.
-c CHUNK_SIZE, --chunk-size=CHUNK_SIZE
Number of rows to act on in chunks. Default: 1000. The lower the number, the shorter any locks are held, but the more operations required and the more total running time. Do not use very low values when the PRIMARY KEY, or otherwise the only UNIQUE KEY are on textual columns, as values from such keys are reused when working the chunks. If you're not sure - stick with the defaults.
--cleanup
Remove custom triggers, ghost table from possible previous runs. In case a previous run was abruptly terminated, this option removes all custom data this utility may have created. It is not necessary to run with this option after a normal completion.
-d DATABASE, --database=DATABASE
Database name (required unless table is fully qualified)
--defaults-file=DEFAULTS_FILE
Read from MySQL configuration file. Overrides --user, --password, --socket, --port.
Configuration needs to be in the following format:
[client]
user=my_user
password=my_pass
socket=/tmp/mysql.sock
port=3306
-g GHOST, --ghost=GHOST
Table name to serve as ghost. When this option is used, a table by this name is created and synchronized with the original table. The original table is thereafter unaltered, and the three AFTER INSERT, AFTER UPDATE and AFTER DELETE triggers are maintained. To perform an ALTER TABLE, do not use this option. [May be removed in future versions]
-H HOST, --host=HOST
MySQL host (default: localhost)
-l, --lock-chunks
Use LOCK TABLES for each chunk. This option enforces a higher locking mechanism, and is at current available as preparation to be able to work with unsupported engines. It is not required nor advisable to use this option with MyISAM or InnoDB engines. [May be removed in future versions]. -p PASSWORD, --password=PASSWORD
MySQL password
-P PORT, --port=PORT
TCP/IP port (default: 3306)
-q, --quiet
Quiet mode, do not verbose. Verbose is on by default, use this option to turn it off.
--sleep=SLEEP_MILLIS
Number of milliseconds to sleep between chunks. Default: 0. Use a higher value if your system suffers from high load average. The higher the value, the more time the system is allowed to 'rest', but also the longer the runtime, and the more overhead (over time) from the triggers effect. You may also wish to set a higher number if slaves are finding it hard otherwise to catch up.
-S SOCKET, --socket=SOCKET
MySQL socket file. Only applies when host is localhost
-t TABLE, --table=TABLE
Table with AUTO_INCREMENT column to alter (optionally fully qualified as database_name.table_name, in which case --database is not required)
-u USER, --user=USER
MySQL user
-v, --verbose
Print user friendly messages. Enabled by default.